Add Custom Checkout Fields in PrestaShop: Easy Guide
Posted On: Sep 4, 2018
Categories: Marketing
How to Create Custom Fields on Your Checkout Page in PrestaShop?
It’s every e-merchant's goal to make the checkout process as smooth and simple as possible. High abandoned cart rates, highlighted by research from Sherpa, SeeWhy, and MarketLive, show that 59.8%, 83%, and 62.14% of potential customers abandon their carts, respectively. For PrestaShop retailers, minimizing cart abandonment is crucial to ensuring a successful checkout for every customer.
How to Make Checkout Simple?
So, how can you streamline the checkout process for a better customer experience? The key is to simplify the checkout form. By including only essential fields and avoiding unnecessary details, you can reduce friction and enhance the user experience.
One Step vs. Multi-Step Checkout in PrestaShop
In PrestaShop, a multi-step checkout process can be a significant barrier to a smooth transaction. By using a one-step checkout plugin, you can condense these lengthy steps into a single, efficient page. This approach should focus on a clean design that requests only the most critical information from customers.
The Importance of Checkout Form Fields
Custom fields on the checkout page are not just about gathering information; they play a vital role in enhancing your service and marketing efforts. They can be used to:
- Improve Future Services: Gather insights to refine your offerings.
- Enhance Marketing Efforts: Tailor your marketing based on collected data.
- Communicate Effectively: Provide relevant information to customers easily.
To enhance your checkout experience further, consider integrating the PrestaShop Custom Checkout Fields Module. This module helps you streamline the checkout process and optimize your store’s performance.
Which Extra Fields Are Useful?
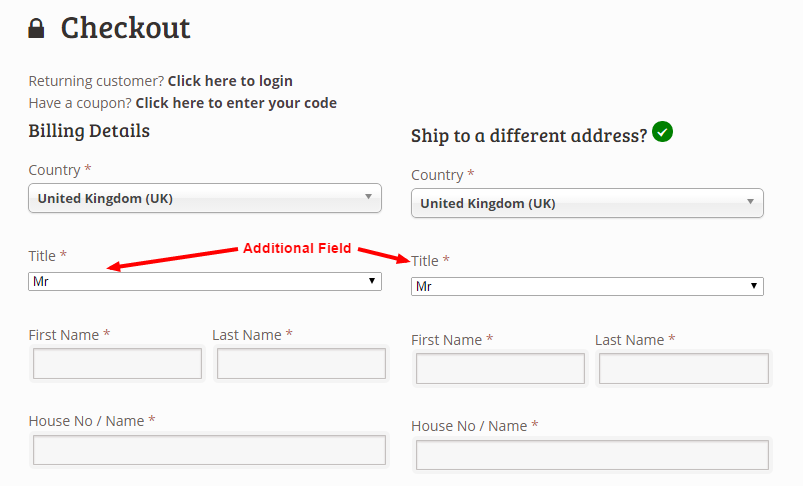
Depending on your needs, you can create various extra fields on the checkout page. Here’s a breakdown of useful fields and their common applications:
- Text Fields: Collect specific information, such as a company name.
- Text Area: Request additional addresses or detailed feedback.
- Date Field: Ask for important dates, like a customer’s birthday.
- Yes/No Fields: Determine preferences, such as payment method.
- Multi-Select: Offer options for communication preferences, like SMS or email.
- Drop-Down: Let customers choose a single option, such as preferred contact method.
- Checkbox: Similar to multi-select but allows multiple selections.
- Radio Button: Choose between shipping options or services.
- Message Only Field: Allow customers to leave custom messages.
How to Create These Fields?
For those with coding skills or access to development resources, implementing custom fields can be straightforward. However, for a more accessible solution, consider using a plugin like PrestaShop Custom Checkout Fields. This tool simplifies the process of adding various fields to your checkout page.
Summary
By transitioning from a five-step checkout to a streamlined one-step process and strategically placing both necessary and extra fields, you can reduce cart abandonment rates and bolster the future stability of your business.
To enhance your checkout experience further, consider integrating the PrestaShop Custom Checkout Fields Module. This module helps you streamline the checkout process and optimize your store’s performance.


