Search Blog
Recent Posts
-
 Why You Should Set Up a B2B...
This blog post highlights why you should consider Prestashop for a B2B business.
Apr 18, 2025 Read more
Why You Should Set Up a B2B...
This blog post highlights why you should consider Prestashop for a B2B business.
Apr 18, 2025 Read more -
 5 Game-Changing Prestashop...
This blog post is all about letting you know about the 5 best Prestashop Modules that Store owners must install to...
Apr 16, 2025 Read more
5 Game-Changing Prestashop...
This blog post is all about letting you know about the 5 best Prestashop Modules that Store owners must install to...
Apr 16, 2025 Read more -
 5 Expert Tips to Boost Your...
This blog post conveys top tips that can help in boosting the speed of Prestashop store.
Apr 10, 2025 Read more
5 Expert Tips to Boost Your...
This blog post conveys top tips that can help in boosting the speed of Prestashop store.
Apr 10, 2025 Read more -
 Get Your Lost Sales Back...
This interesting blog post conveys how the innovative Abandoned Cart Reminder Module can help you improve sales.
Apr 8, 2025 Read more
Get Your Lost Sales Back...
This interesting blog post conveys how the innovative Abandoned Cart Reminder Module can help you improve sales.
Apr 8, 2025 Read more -
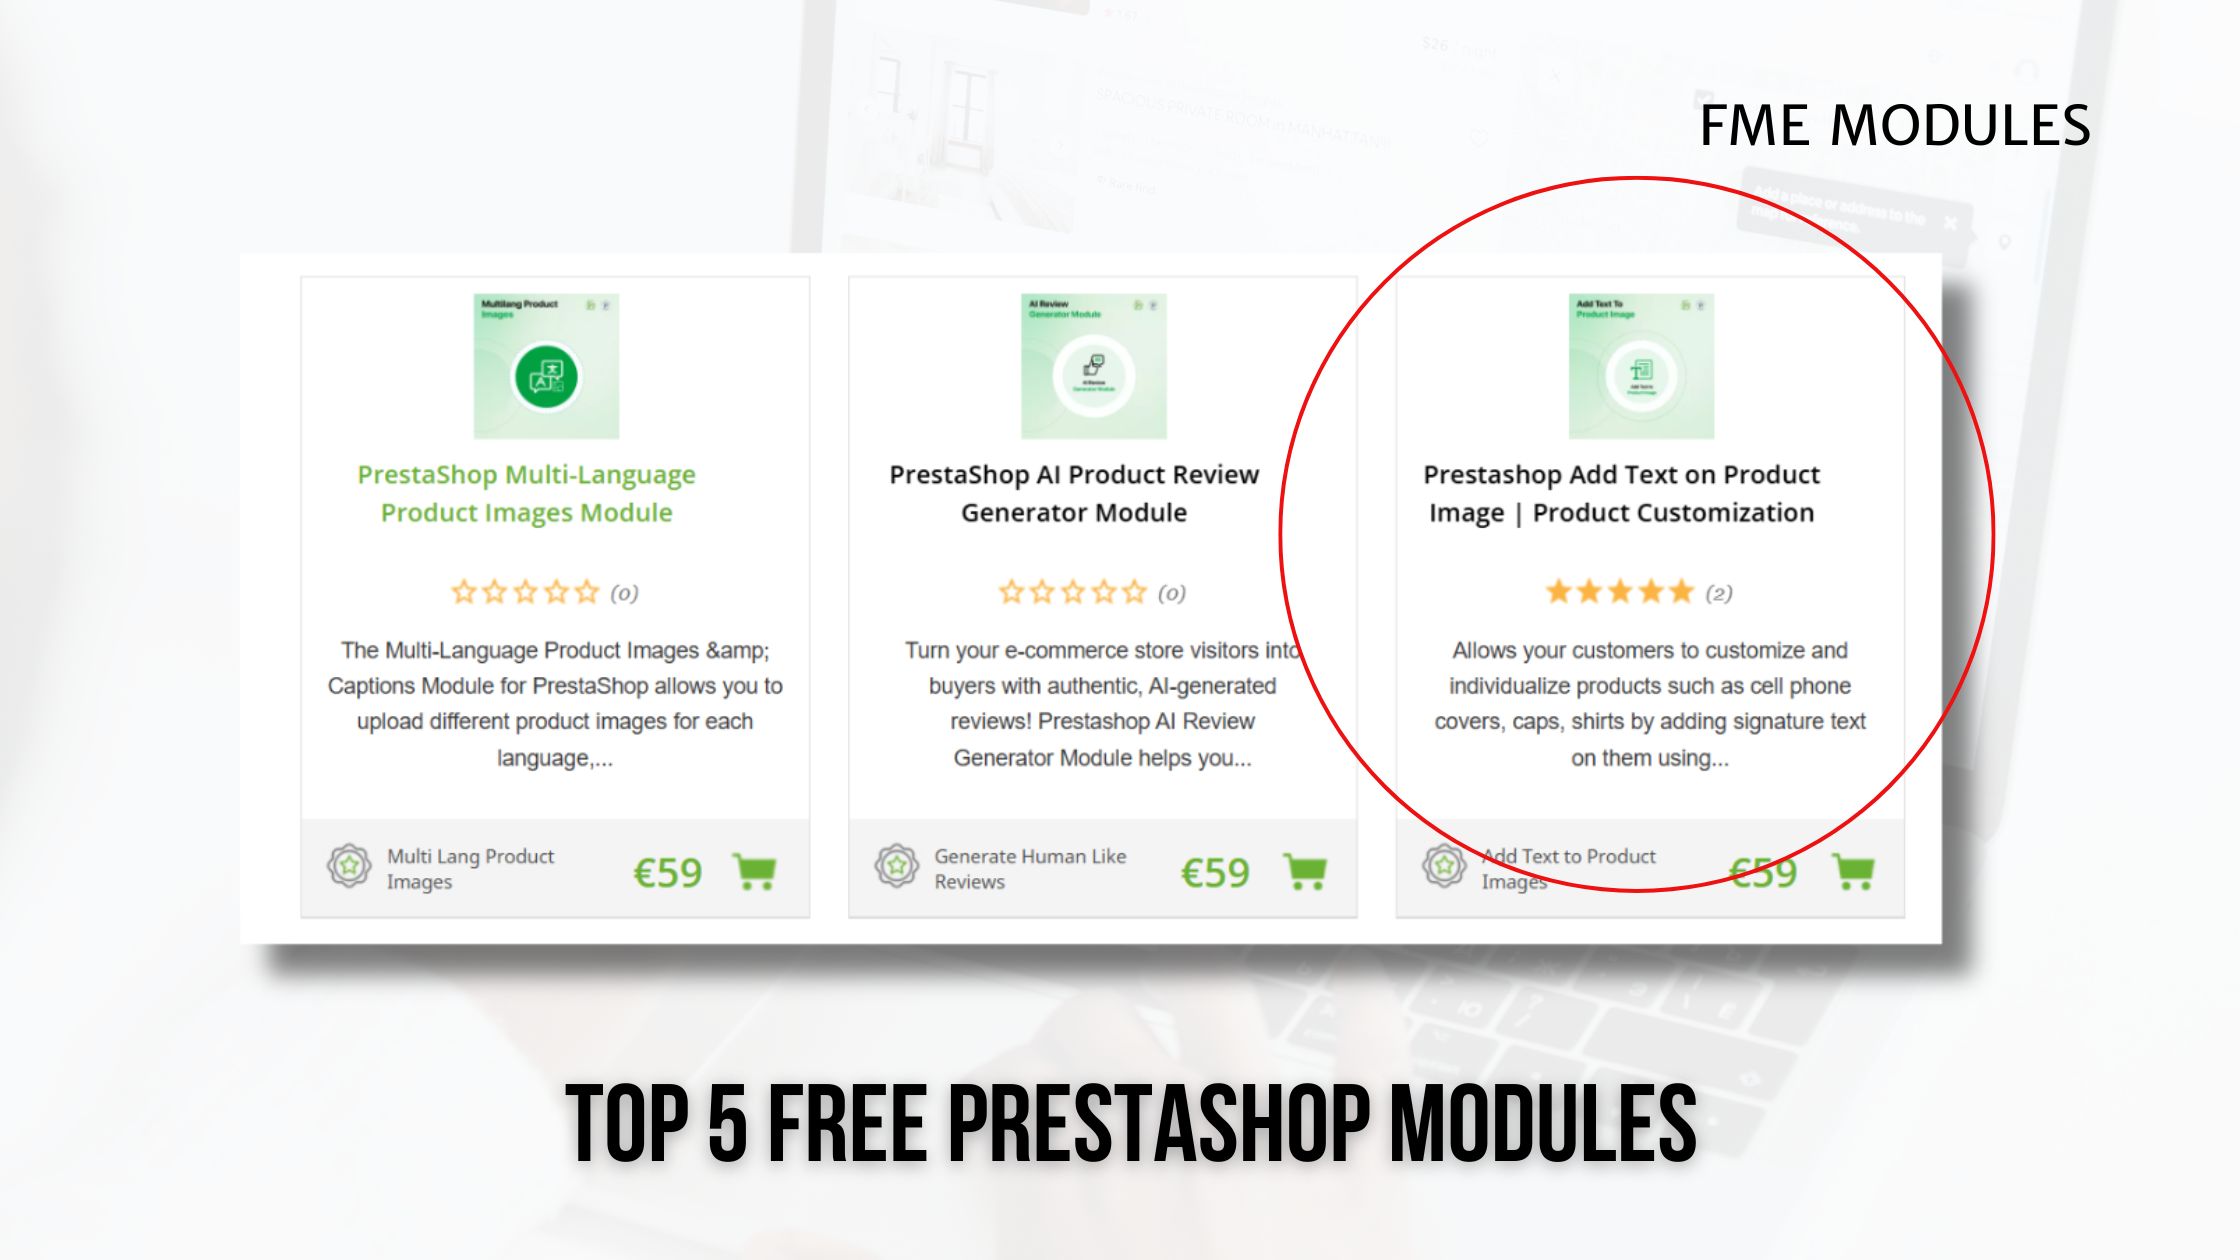 5 Must-Have Free Prestashop...
This blog post is about the best 5 free Prestashop Modules that an e-commerce must try 5 modules.
Mar 28, 2025 Read more
5 Must-Have Free Prestashop...
This blog post is about the best 5 free Prestashop Modules that an e-commerce must try 5 modules.
Mar 28, 2025 Read more

Best Practices to Customizing Your PrestaShop Registration Form: A Complete Guide
Posted On: Jul 31, 2024
Categories: PrestaShop SEO Best Practices: Guides, Checklists & Tips
Best Practices to Custom PrestaShop Registration Form
Have you installed Prestashop and finally set up your shop but you need to change a couple of fields? Where could be that Prestashop Registration form?
Maybe you need help nesting, enabling or even migrating any form to ease out the customer filling in his information. Or maybe you just need to gather additional information on your customers for your email marketing campaign?
You are at the right place!
Welcome to the ultimate guide for customizing your PrestaShop registration form using the PrestaShop Custom Registration Field Module. This complete, one-stop solution guide will walk you through the process of enhancing your registration forms to collect valuable customer information, improve user experience, and streamline your store's operations.
We'll cover everything from installation and configuration to advanced customizations and troubleshooting. Let's dive in!
In the world of e-commerce, first impressions matter. Your registration form is often the first interaction a customer has with your store. A seamless, customized experience can significantly impact customer satisfaction and retention.
According to a study by Baymard Institute, 28% of online shoppers abandon their carts due to a long or complicated checkout process, which often starts with registration.
By optimizing your Prestashop registration form with custom fields, you can not only capture more relevant customer data but also enhance user experience and reduce abandonment rates.
Understanding the PrestaShop Custom Registration Field Module
The PrestaShop Custom Registration Field Module is a powerful tool designed to help store owners add, manage, and customize fields in the customer registration form. This flexibility allows you to gather specific information from your customers that is essential for your business operations. Key features include:
-
Adding Various Field Types: The module supports a wide range of field types such as text fields, dropdowns, checkboxes, radio buttons, and more, allowing you to collect the exact data you need.
-
Customizing Field Labels and Validation: You can personalize field labels to match your brand's voice and set validation rules to ensure data integrity.
-
Displaying Custom Fields on Various Admin and Customer Pages: The module allows you to show custom fields on customer detail pages, order detail pages, invoices, and even in the customer's account section.
This module addresses common pain points faced by e-commerce businesses.
For example, many store owners struggle with collecting detailed customer information during the registration process.
By utilizing custom fields, you can gather data like customer preferences, additional contact information, and more, which can be crucial for personalized marketing and improving customer service.
Let's expand on the guide by detailing the installation process and configuration steps, followed by advanced customization options.
Installation Instructions
-
Log into the PrestaShop administration panel, go to Modules → Click Add new module.
-
Select registrationfields.zip which you downloaded and click Upload this Module.
-
Scroll down to find Registration Fields and click Install.
-
Clear Cache in Advance Parameters → Performance.
-
The Module will add an extra Tab Link in Back Office Edit Product and you will see the tab on the left.
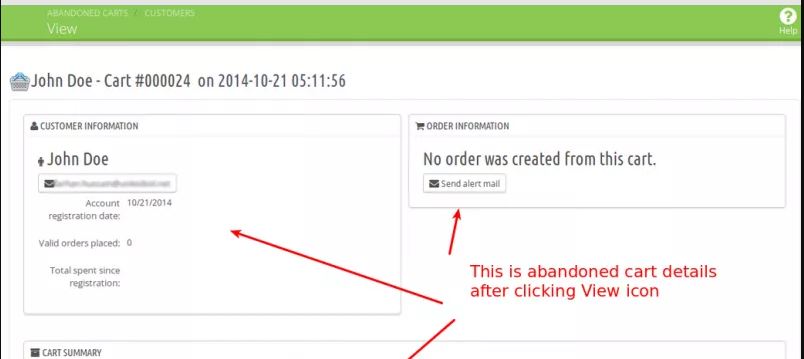
-
A preview of the customized product will be shown with the order on the order detail page.
User Guide On The Workflow Of Prestashop Registration Form Module
How to Configure the Module:
At the back office, go to "Module & Services" and click on the "Installed Modules" tab. Here you will find our module. Click on "Configure" to continue.

-
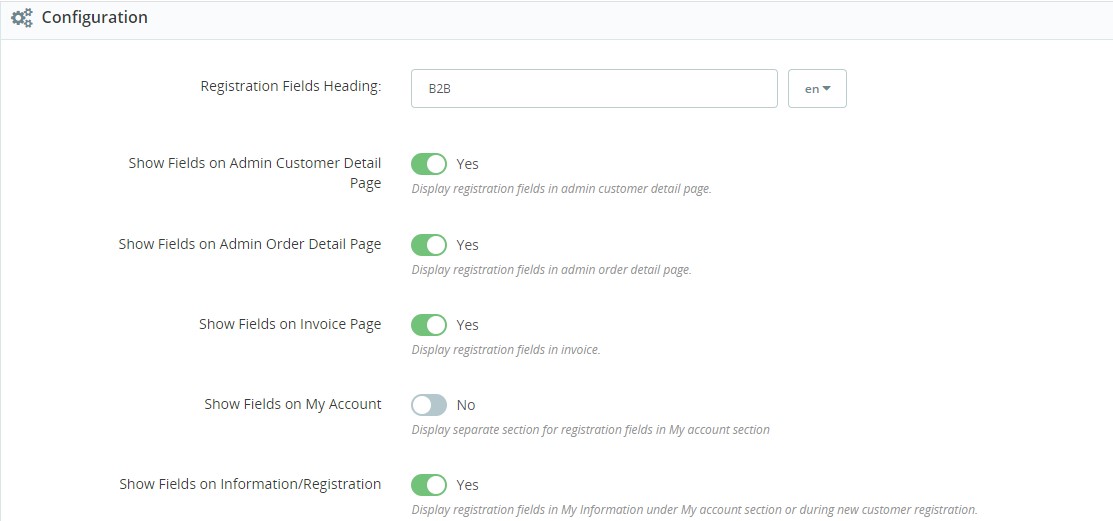
Registration Fields Heading
-
Show Fields on Admin Customer Detail Page: Display custom registration fields in the admin customer detail page.
-
Show Fields on Admin Order Detail Page: Display custom registration fields in the admin order detail page.
-
Show Fields on Invoice Page: Display custom registration fields in the invoice.
-
Show Fields on My Account: Display a separate section for registration fields in the My Account section where the user will be able to see custom fields.
-
Show Fields on Information/Registration: Display registration fields in My Information under the My Account section or during new customer registration.
-
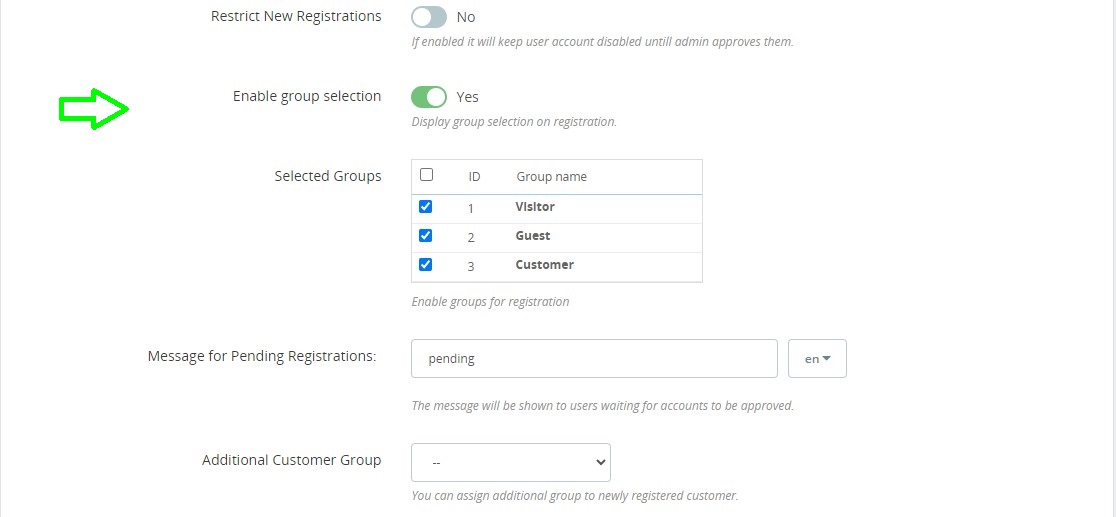
Restrict New Registrations: Option to enable the admin approval for the user account validation. If enabled, the user will be able to use his account after the admin manually approves it.
-
Enable Group Selection: Option to display group selection on the registration form. If enabled, users will be allowed to select the user group on the registration form.
-
Selected Groups: Only these selected groups will be shown for selection to the users.
-
Message for Pending Registrations: Show a custom message to the users where registration is pending.
-
Additional Customer Groups: Admin can assign a default user group to the new registered user automatically. Should not be when the admin has enabled group selection for users.
-
Redirect After Registration: Option to add a URL to redirect users after registration.
-
Lock Fields: Option to make fields not editable in the user's My Account section.
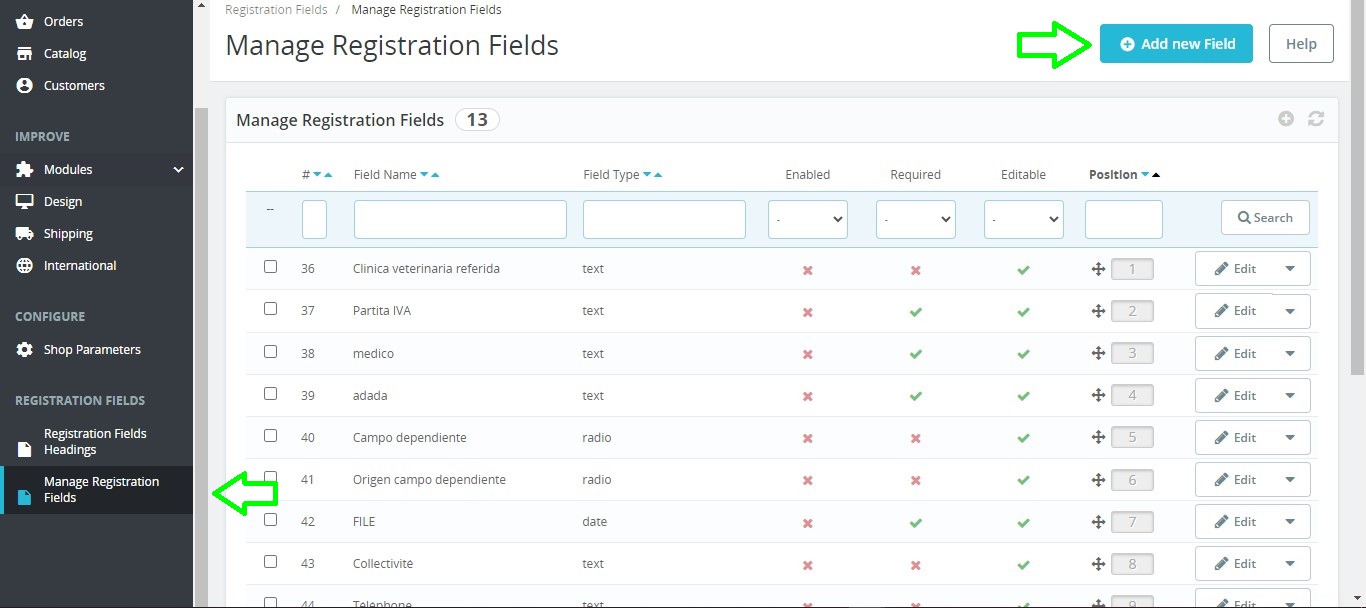
How to Add/Manage Registration Fields:
Step 1: At the back office, go to "Manage Custom Fields". Here you will find all the fields. Click on "+ Add New Field" to continue.
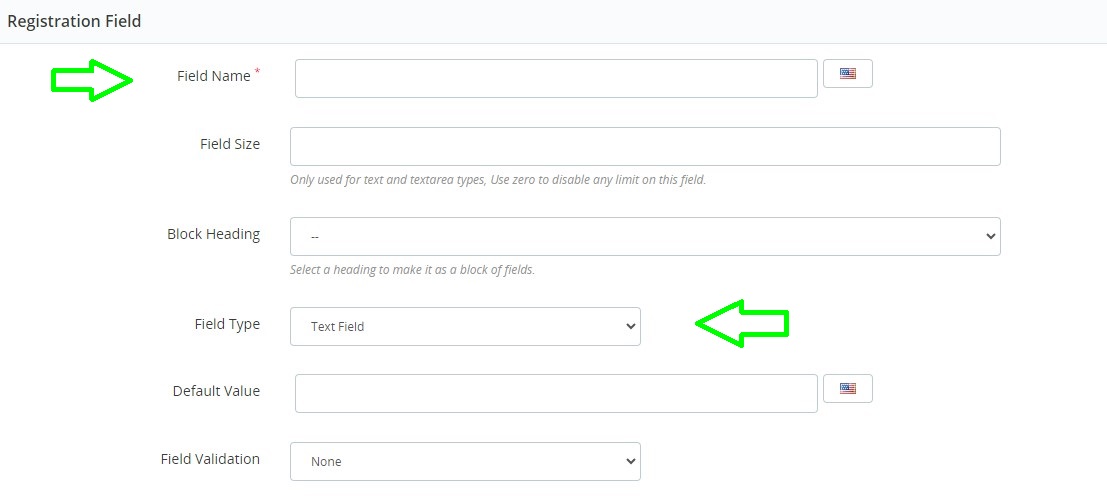
Step 2: Here you can add your fields' information.
-
Field Name
-
Field Size: Select the number of characters that are allowed for this field
-
Block Heading: Select the block in which you want to show this filed. More on that later
-
Field Type: Select the type for this field. There are following field types
-
Text Field
-
Text Ares
-
Date
-
Yes / No
-
Multiple Select
-
Dropdown
-
Checkbox
-
Radio Button
-
File Attachment
-
Message
-
Default Value: This will be the default value for this field
-
Field Validation: Allows you to see if the data entered to this field is in correct format. If you select "Date" here, user will only able to add date in this field.
-
Editable: If enabled user will be able to edit the data later.
-
Values Required: Option to make this field mandatory
-
Field Status:
-
Dependent Field: Option to make field dependable. More on this in next step
Step 3: Now at the front end your field will appear as the following. You can always go back and edit this information.
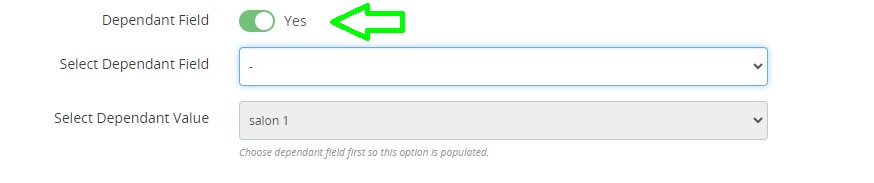
How to Use Dependable Fields:
Dependable fields are those fields where input option is dependent on what user selects. See the image below for more clarification.
-
When you are adding a field from the backend, enable the dependent field option at the end.
-
Next Select the field on which the current field will be dependent.
-
Then select the dependent field value
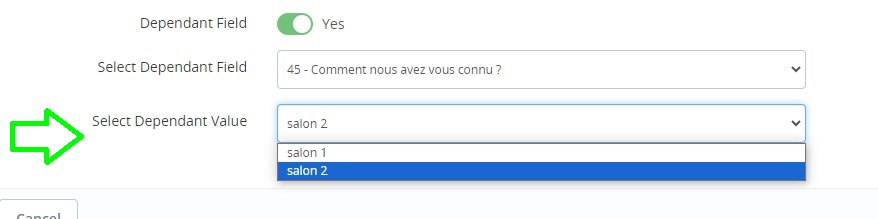
Now your current field will only appear if the customer selects the "1.7.x.x" option in the "Favorite Prestashop version" option.
Custom Field Headings: At the back office, go to "Custom Field Headings". Here you will find all the headings created. Click on "+ Add New Heading" to continue.
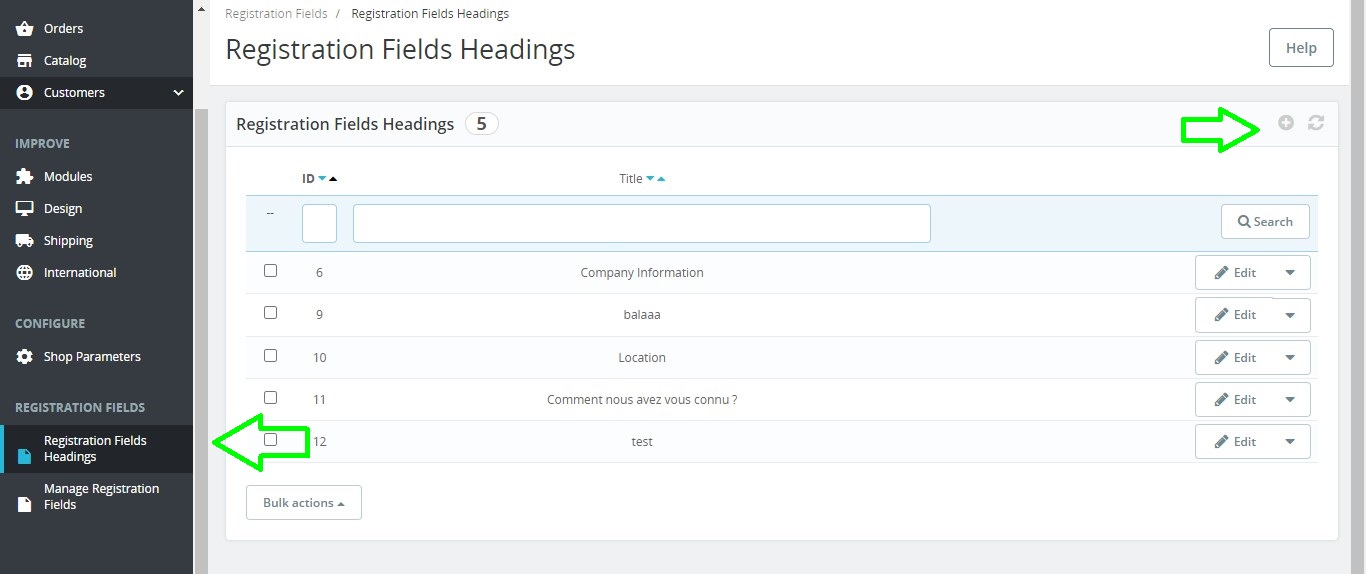
Add Custom Field Heading: Admin can create multiple field headings to use at the front end.

Disclaimer
-
It is highly recommended to backup your server files and database before installing this module.
-
No responsibility will be taken for any adverse effects occurring during installation.
-
It is recommended you install on a test server initially to carry out your own testing.
Support
-
If you need more information or have any questions or problems, please refer to our support helpdesk
-
You can log a ticket and a support technician can assist you further.
Customization
If you have requirements that are not covered by our module and you need to have our module customized, feel free to contact us through support helpdesk.
Managing and Maintaining Custom Fields
Best Practices
When it comes to managing your PrestaShop registration form, keeping your custom fields up-to-date is key. Here are some best practices to help you stay on top of things:
-
Regular Reviews and Updates
Just like any part of your online store, custom fields need regular reviews. Check if the information you're gathering still aligns with your business goals. Are there fields that no longer serve a purpose? Update or remove them as needed to keep your form streamlined and relevant.
-
Archiving Unused Fields
Instead of outright deleting fields you no longer need, consider archiving them. This way, you retain the data for future reference or analysis without cluttering your active registration form. It's like spring cleaning for your PrestaShop registration form!
Handling Data
The data you collect from your PrestaShop registration fields is a goldmine. Here's how to handle it effectively:
-
Export for Analysis
Regularly export the data collected through your custom fields. This will help you analyze customer preferences and behaviors. Tools like Excel or Google Sheets can be handy for sorting and interpreting this information.
-
Tailor Marketing Strategies
Use the insights gained from your data analysis to fine-tune your marketing strategies. For instance, if you notice a significant number of customers are interested in a particular product category, you can create targeted campaigns to boost sales in that area. Personalized marketing leads to happier customers and better business outcomes.
Regular Maintenance
Keeping your PrestaShop registration form in tip-top shape involves regular maintenance:
-
Module Updates
Always check for updates to the PrestaShop Custom Registration Field Module. These updates often include bug fixes and new features that can improve your form's functionality. Staying current ensures your registration form works smoothly.
-
Periodic Testing
Periodically test your registration form to ensure it's functioning correctly. This helps catch any issues early before they affect your customers. Try registering as a new user yourself to see if everything runs as expected.
Troubleshooting Common Issues
Even with a robust tool like the PrestaShop Custom Registration Field Module, you might run into a few hiccups. Here are some common issues and their solutions to keep your PrestaShop registration form running smoothly:
1. Fields Not Saving
One frustrating problem is when fields don't save properly. This usually stems from missing or incorrect configurations. Here's what to do:
Solution:
-
Check Required Fields: Make sure all required fields in the module settings are filled out. Missing mandatory fields can block the saving process.
-
Correct Data Format: Verify that the data entered is in the correct format. For example, if the field is set to accept dates, ensure the input is a date.
-
Clear Cache: Sometimes, cached data can prevent changes from showing. Clear the cache by going to Advanced Parameters → Performance.
-
Check for Errors: Look for error messages when trying to save fields. These messages can provide valuable clues about what's going wrong.
2. Removing Unwanted Fields
Over time, you might find certain fields are no longer necessary. Removing these can declutter your PrestaShop registration form.
Solution:
-
Navigate to Manage Custom Fields: Go to the Manage Custom Fields section in the back office.
-
Delete or Disable Fields: Identify the fields you don't need. Choose to delete them or disable them if you might need them in the future.
-
Confirm Changes: Save your changes and check the front-end to ensure the fields have been removed.
3. Module Conflicts
Sometimes, conflicts between modules can cause issues. Identifying and resolving these conflicts is crucial for a functional site.
Solution:
-
Identify Conflicts: Temporarily disable other modules one by one to see if the issue is resolved. This helps pinpoint the conflicting module.
-
Consult Support: If disabling a particular module resolves the issue, contact the support team for that module for a permanent fix.
-
Update Modules: Ensure all your modules, including the PrestaShop Custom Registration Field Module, are updated to the latest versions. Updates often include bug fixes and compatibility improvements.
Final Thoughts
You need to customize your PrestaShop registration form for enhancing user experience and collecting valuable customer data. By following all the best practices listed above for managing and maintaining custom fields, handling data effectively, and troubleshooting common issues, success is yours.
You can ensure your registration process is smooth and efficient. Stay updated with module updates and regularly test your form to keep it in top condition. With these strategies, your PrestaShop registration form will become a powerful tool for growing your online business.
FAQs:
What is a registration module in PrestaShop?
A module that allows customization of the registration form to gather specific customer information.
How do I add a module to PrestaShop?
Upload the module file in the Modules section and click Install.
How do I install a module in PrestaShop?
Follow the installation instructions provided in the module's user guide.
How do I set up PrestaShop?
Download PrestaShop, upload it to your server, and follow the installation script.
How can I add a custom field in the registration form?
Use the PrestaShop Custom Registration Field Module to add and configure new fields.
How do I customize the customer registration form in PrestaShop?
Modify existing fields or add new ones using the module settings.
How do I save a new field I added to the customer registration form?
Ensure all information is correct and click Save in the module settings.
How can I remove the sign-in and register account form in PrestaShop 1.7.6?
Modify the template files or use a module that provides this functionality.
How do I make fields on the customer registration form in PrestaShop required?
Toggle the required status in the module settings.
How can I add address form fields to the registration form?
Use the module to add and configure address fields as needed.